
How To - Voucher Manager Setup
Voucher Manager Setup
In the first instance, a voucher manager account should be setup. The Voucher manager account request form can be found in the Voucher Manager section the Zonal Resource Centre.
Managing Prefixes
All codes must have a prefix; these are typically 1-3 characters long. Prefixes need to be defined in both voucher manager and Aztec.
-
Select the relevant customer, then select Prefixes in voucher manager
-
All existing prefixes will be listed (both enabled and disabled).
-
Enter the prefix required. It is best practice for all prefixes to be capital letters.
-
Select Voucher Manager in the Type drop down box.
- Select Create Prefix

If you wish to setup Eagle Eye Prefixes then please refer to the “Voucher Manager – Eagle Eye integration” guide found in the Voucher Manager section the Zonal Resource Centre

Enabled prefixes can be disabled by selecting disable
Manage API accounts
The Voucher Manager API account is the credential that the POS plugin requires to connect to Voucher Manager. These should be generated for each site.
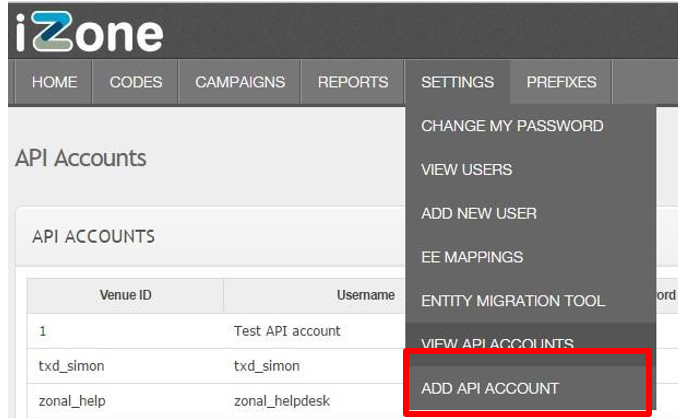
To view all API accounts
-
Select Settings
-
Choose View API accounts
-
This will then list all current API accounts
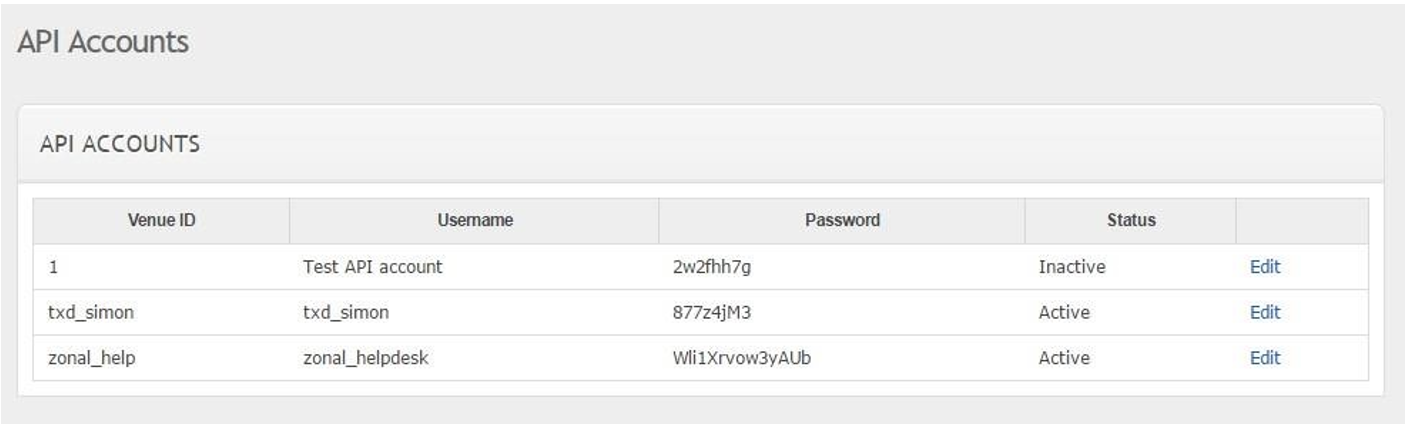
- Venue ID – This should be the Aztec Site Ref
- Username – The API account username
- Password – The API Password
- Status – shows whether the account is active or disabled
To add an API account
- Select Settings
- Choose Add API account
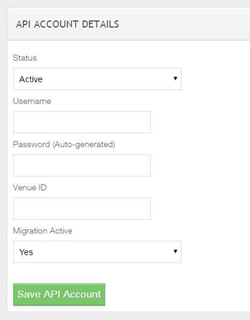
- Status – This should be the Aztec Site Ref
- Username – The API account username
- Password – The API Password
- Venue ID – shows whether the account is active or disabled
- Migration Active – This should be set to No, this is for sites that are migrating between Voucher manager accounts.
- The below screen will appear:
- Select Save API account, and a password will be generated.
You can view the password on the View API accounts page.